Are you tired of the hassle that comes with screen reclamation? We've got some exciting news that will change your screen printing game forever – introducing the Sgreen® Dunk Tank!
HOW DOES IT WORK
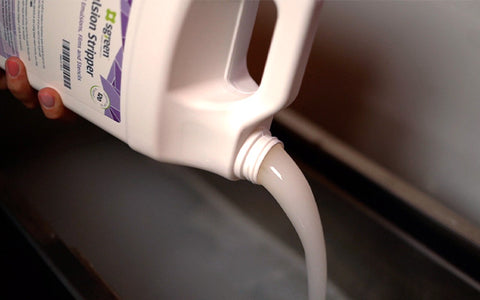
It's as easy as 1-2-3. First, fill the tank with 27 gallons of water and add three gallons of Emulsion Remover. Next, place up to six screens in the tank, and let them soak for just a minute or two. Finally, remove the screens and use a power washer to effortlessly remove the emulsion. It's that simple and efficient! Plus, you don't have to worry about any leaks thanks to its durable welded aluminum construction – guaranteed to be leak-proof!
RELATED: 3 COMMON SCREEN PRINTING RECLAIM CHALLENGES & HOW TO SOLVE THEM

WHY THIS DUNK TANK
While you may have seen dunk tanks before, the Sgreen® Dunk Tank comes with some fantastic upgrades. Our tank features new-and-improved aluminum walls instead of plastic, reducing bulging and ensuring your chemicals stay right where you want them. Worried about containment? We've got you covered with an option to add a stainless steel lid to your dunk tank.
But the Sgreen® Dunk Tank isn't just about the tank itself – it's also about the chemicals. We believe in using environmentally friendly options, like Sgreen® Emulsion Remover. It's not only eco-conscious but also a powerful solution that effortlessly cuts through all types of emulsions, including pure photopolymer, dual-cure, and capillary emulsions. With Sgreen® chemicals, you can fill that dunk tank with confidence, knowing you're keeping yourself healthy while achieving the best clean possible.

TIPS FOR SUCCESS
Pour water into the tank first, followed by the Emulsion Remover. This helps prevent excess foaming, saving you time. For first-time dunk tank users, we recommend testing with one screen for about 30 seconds and then power washing it off. If it works great, you're all set to start reclaiming. Don't worry if you notice bits of emulsion falling off in the dip tank – it won't affect the solution's efficiency. And remember, screens with thicker mesh counts take a bit longer to reclaim than those with thinner mesh counts. Adjust your wait times accordingly.
Before placing screens in the dunk tank, ensure they're free of ink. Use Sgreen® Supreme Wash or Sgreen® Ink Degrader to wipe off all ink residues, allowing for a smoother reclaiming process.
RELATED: 2 WAYS TO USE EMULSION STRIPPER DURING THE SCREEN RECLAIM PROCESS
CLEANING THE DUNK TANK
Wondering what to do when it's time to replenish the solution? As you use the tank, you'll notice some solution leaves the tank. Eventually, it'll need a refill. Here's how to do it:
- Use a sump pump, such as the one in the Sgreen® Filtration System, to remove the solution through a filtration system. This ensures that any byproducts don't end up down the drain.
- Clean out the tank thoroughly, rinsing it, and washing the sides to remove any residue.
- Refill the tank with water and Emulsion Remover.
Keeping your tank clean ensures a sharp and effective screen reclamation process every time.
Having a dunk tank in your shop will save you tons of energy and time. Simply pop your screens in the tank and get back to watching that new show you've been binging. Reclaim screens from the comfort of your couch with the Sgreen® Dunk Tank.